Instalación y configuración de 360 Wi-Fi
El sistema de 360 Wi-Fi reemplaza un enrutador tradicional para proporcionar cobertura Wi-Fi premium. Sigue los pasos que se indican a continuación para instalar el nuevo servicio de 360 WiFi y ponerlo en funcionamiento.
Video: instalación de 360 WiFi
VIDEO 3:58
Descarga la aplicación Quantum Fiber
El primer paso es descargar la aplicación Quantum Fiber e ingresar con tu dirección de email y contraseña de la cuenta.
El proceso de configuración debería tardar entre 10 y 15 minutos. Para comenzar:
1. Presiona 360 WiFi Pods en la pantalla de inicio.
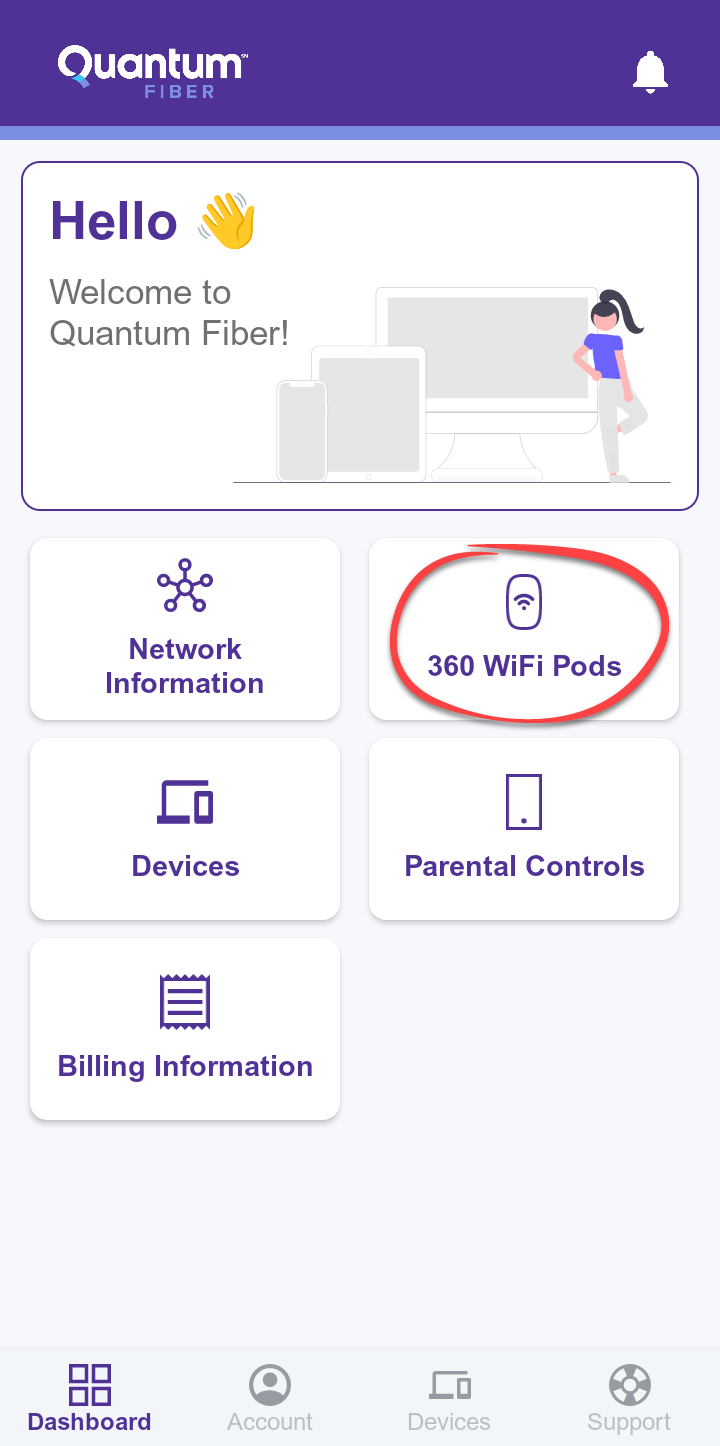
2. Pulsa set up wired pod (configurar pod con cable) y sigue las instrucciones para conectar tus pods y activar tu red Wi-Fi.
Puedes ver las capturas de pantalla y las instrucciones paso a paso a continuación.
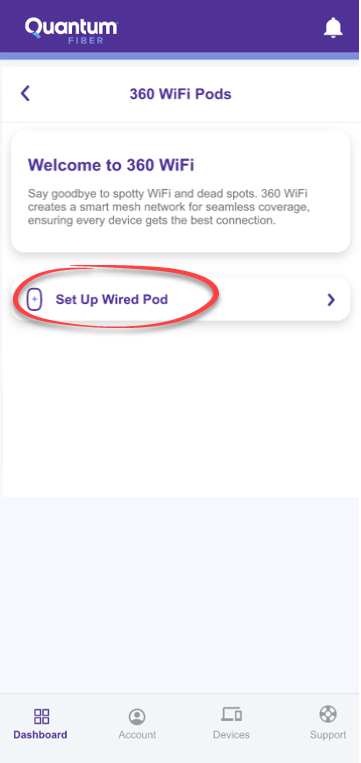
Conecta el pod con cable y crea tu red Wi-Fi
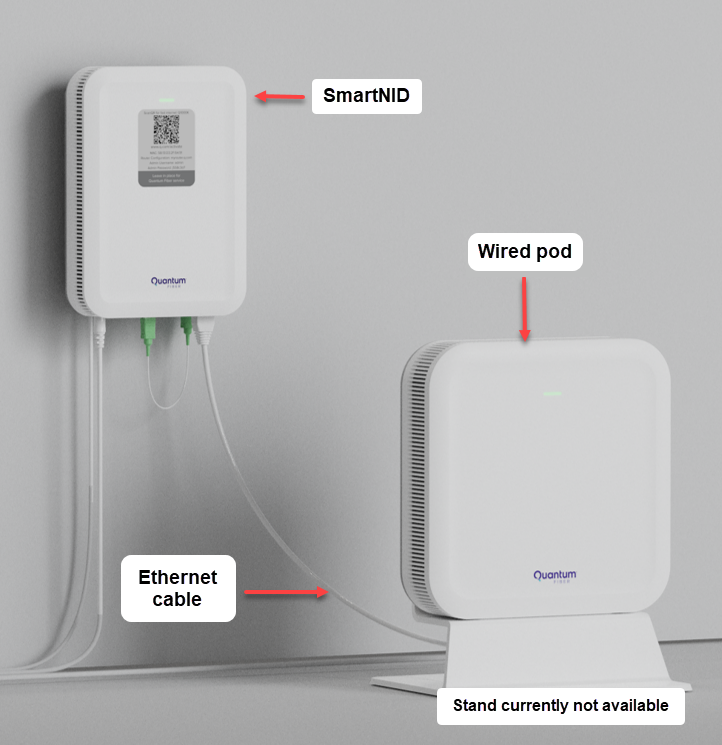
1. Conecta el pod con cable al SmartNID. Usa el cable Ethernet Cat6 suministrado. Conecta uno de los extremos en el puerto WAN 10, ubicado en la parte inferior del pod con cable. Enchufa el otro extremo en el puerto correcto del SmartNID (consulta las imágenes de abajo). Luego, enchufa el pod en un tomacorriente usando el cable de alimentación suministrado. No lo enchufes en una extensión eléctrica o en un divisor.
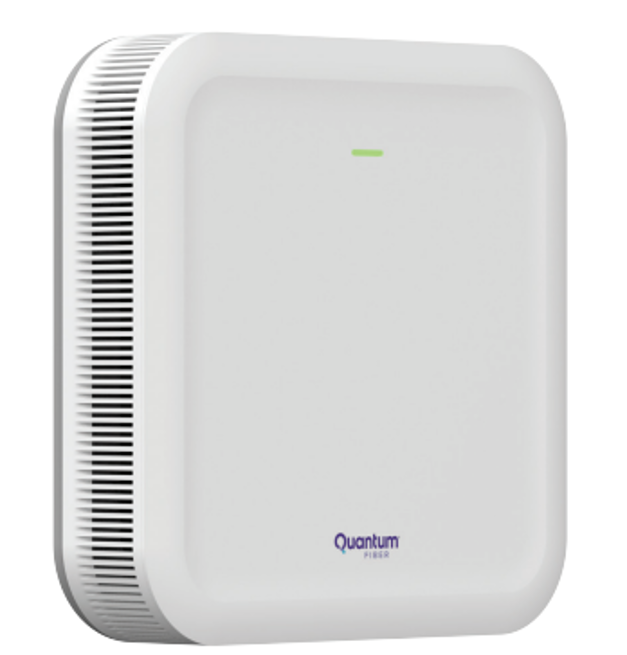
Pod con cable W1700K
Atención: ¡No es un módem! No intentes sustituir tu SmartNID por este dispositivo.
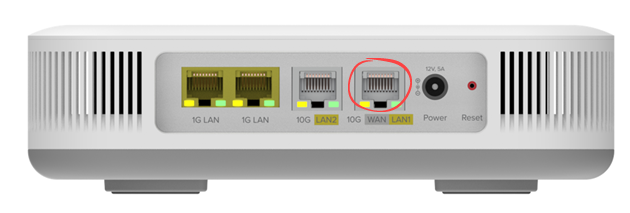
Pod con cable. Conecta el cable Ethernet al puerto WAN/LAN 10G
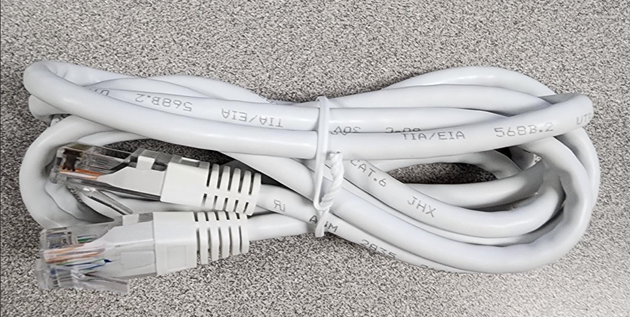
Cable Ethernet Cat6

C5500XK. Conéctalo en el puerto WAN/LAN1
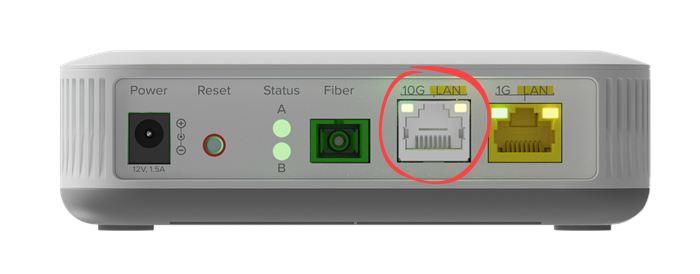
Q1000K. Conéctalo al puerto LAN 10G
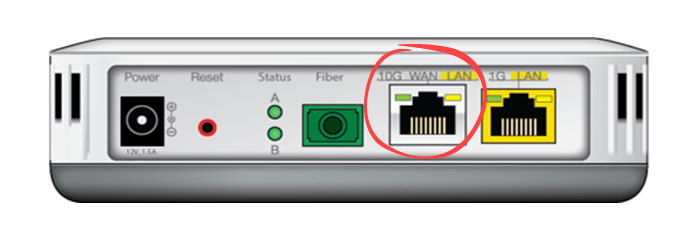
C6500XK. Conéctalo en el puerto WAN/LAN 10G
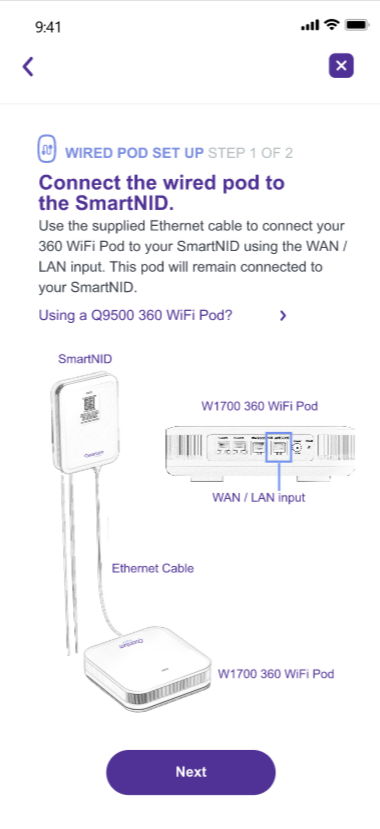
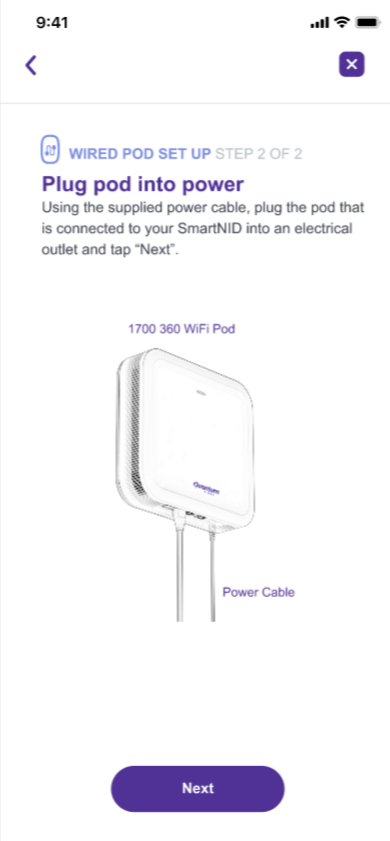
2. Configura la nueva red Wi-Fi. Ingresa un nombre de red (SSID) y una contraseña de red fuerte; a continuación, ingresa la contraseña para confirmar. Luego, tendrás que reconectar de forma manual cada uno de los dispositivos conectados a esta red usando tu nueva SSID y contraseña.
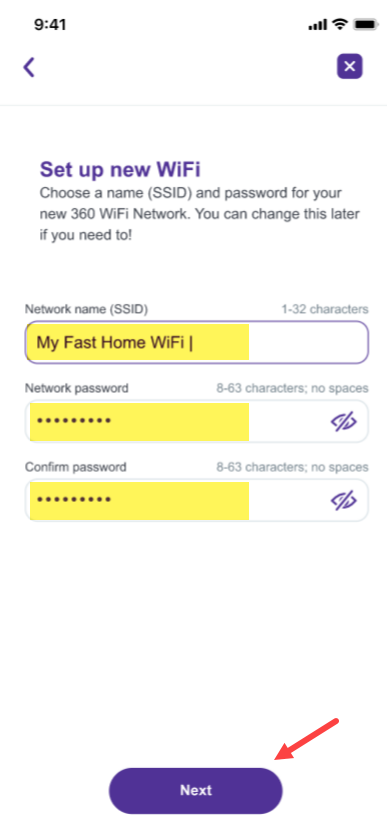
Aviso para dispositivos con Windows 10: requisito de la contraseña
Si tienes un dispositivo que funciona con el sistema operativo Windows 10, tu contraseña de Wi-Fi no puede incluir apóstrofes (') ni comillas ("). Si se utilizan estos caracteres en tu contraseña actual, elimínalos y guarda una nueva contraseña para conectar los dispositivos y ver tus pods de Wi-Fi en la aplicación.
Solo se aplica a Windows 10.
3. Buscando pods. El sistema ubicará tu pod. Esto puede llevar un momento.

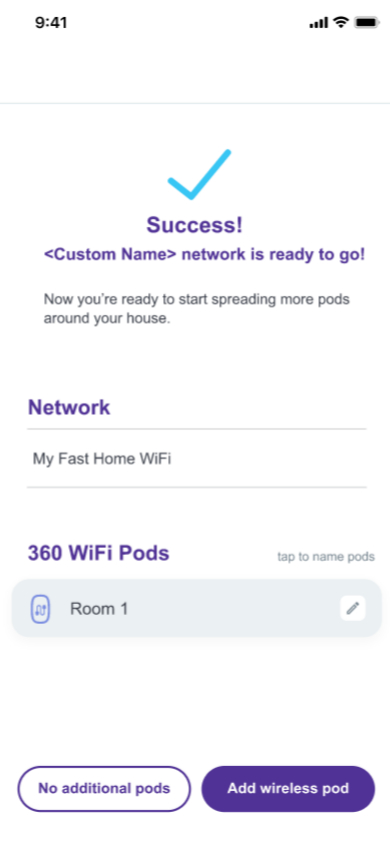
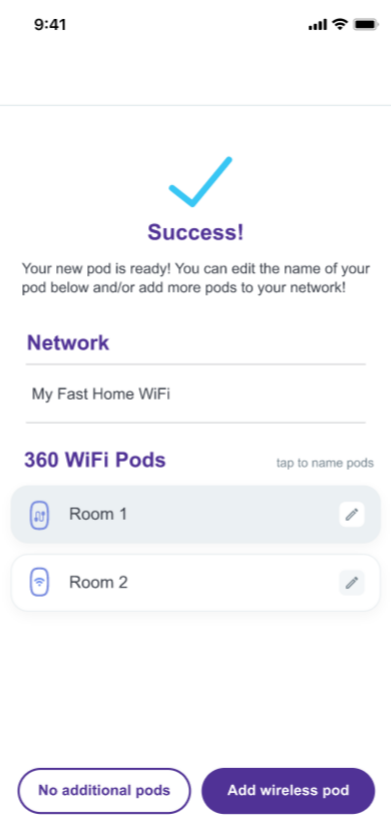
4. ¡Éxito! Cuando se complete la acción, verás en pantalla el mensaje "Success" (Éxito) con el nombre de tu nueva red Wi-Fi y el pod que acabas de agregar. Toca el icono del lápiz para editar el nombre del pod. También puedes saltarte este paso y hacerlo más tarde.
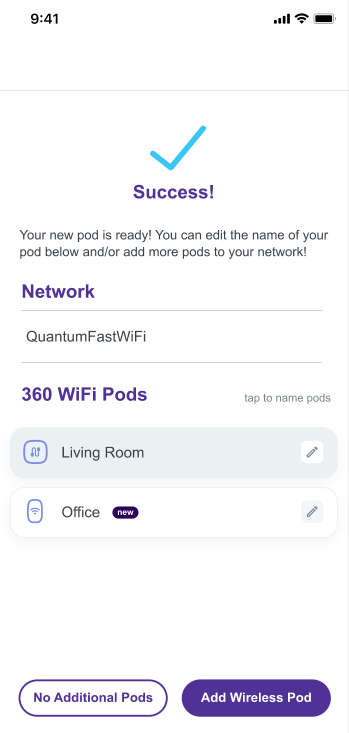
Ahora puedes conectar dispositivos a tu red, establecer controles parentalesy usar Wi-Fi toda la noche.
Conecta el pod inalámbrico (no requerido para la mayoría de las configuraciones)
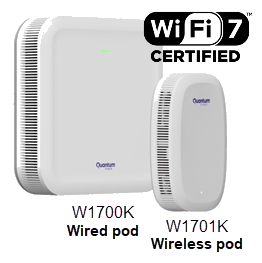
¿Tienes un segundo pod?
Si tu envío incluía un pod inalámbrico, continúa con la siguiente sección.
La mayoría de los hogares obtienen la cobertura suficiente con un pod con cable. Demasiados pods pueden causar interferencias y empeorar el rendimiento.
Prueba nuestra guía de solución a problemas en el caso de experimentar una conexión lenta o irregular.
5. Pulsa Add wireless pod (Agregar pod inalámbrico) en la pantalla del mensaje de éxito.
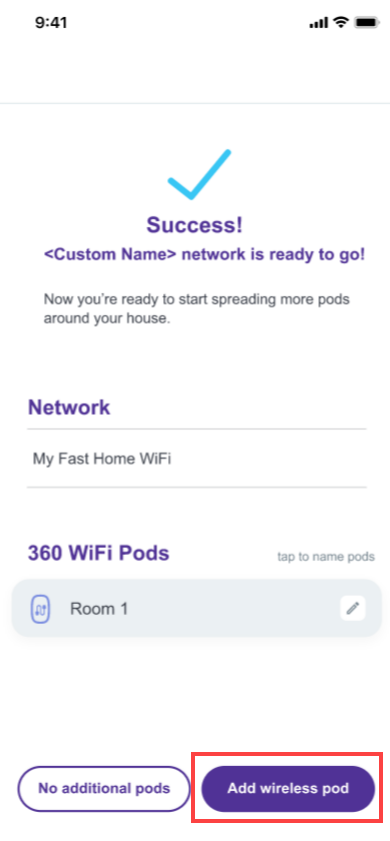
6. Escanea e identifica tu pod. Con la cámara de tu teléfono, escanea el código QR que está en la parte posterior del pod inalámbrico W1701K.
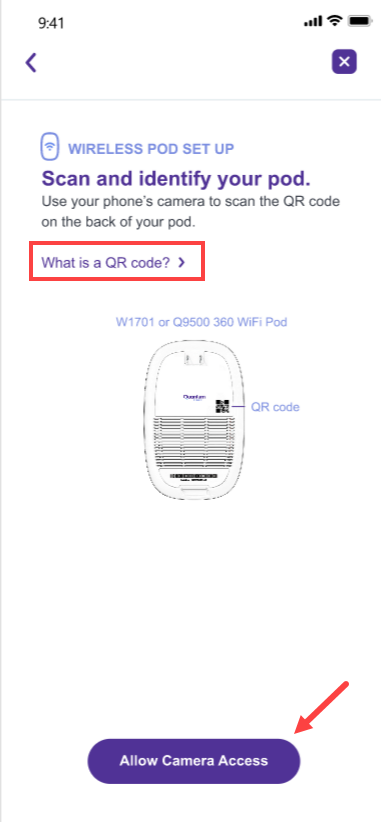
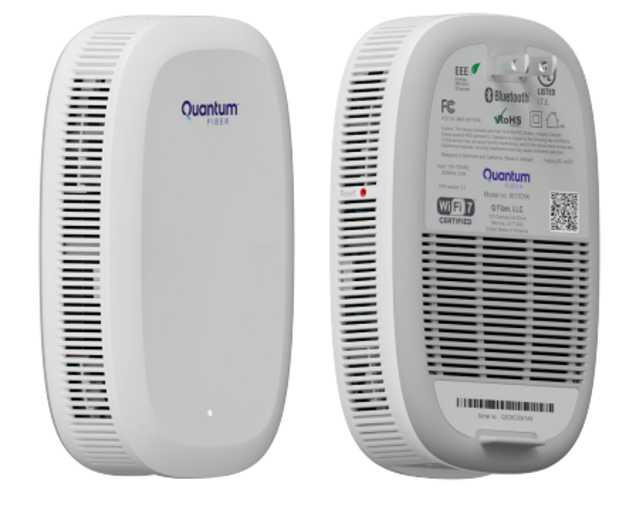
Vista frontal y posterior de un pod inalámbrico W1701K
Tendrás que habilitar la función de escanear en tu teléfono; toca el botón Allow Camera Access (Permitir acceso a la cámara) en la aplicación y, a continuación, toca Allow (Permitir) en la siguiente pantalla. Si prefieres, puedes seleccionar Don't Allow (No permitir) e ingresar el número de serie del pod de forma manual.
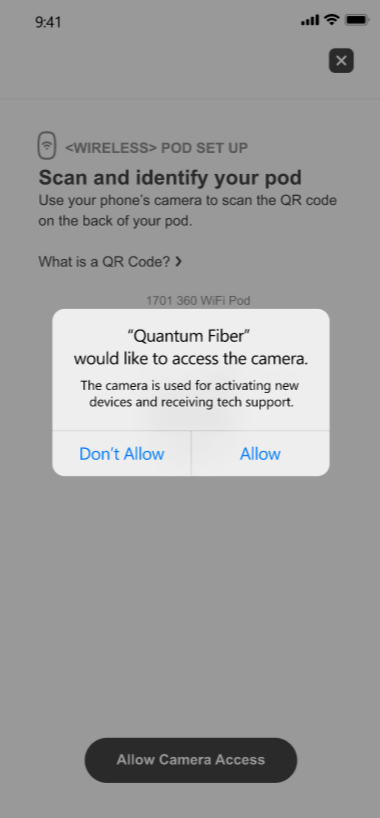
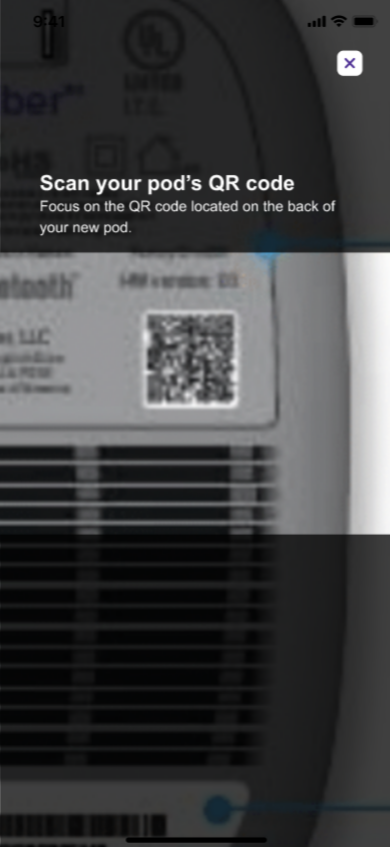
Nota: si necesitas ayuda para ubicar tu pod, toca el enlace Pod Placement Tips (Consejos para la ubicación de pods) en la aplicación, o bien revisa los consejos en el menú desplegable a continuación.
7. Enchufa el pod inalámbrico en un tomacorriente y, luego, toca Next (Siguiente) en la aplicación.
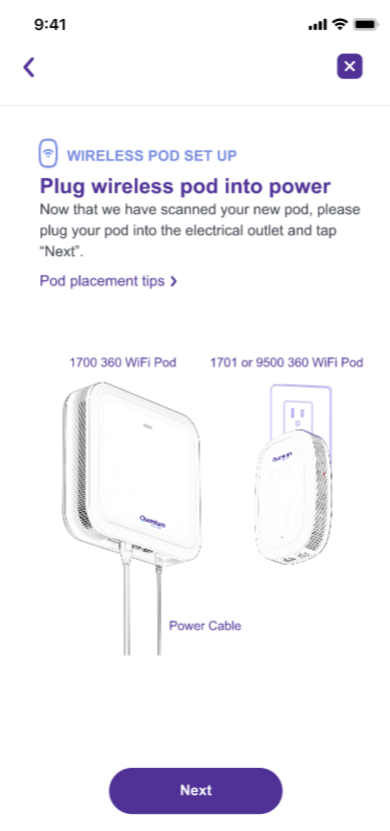
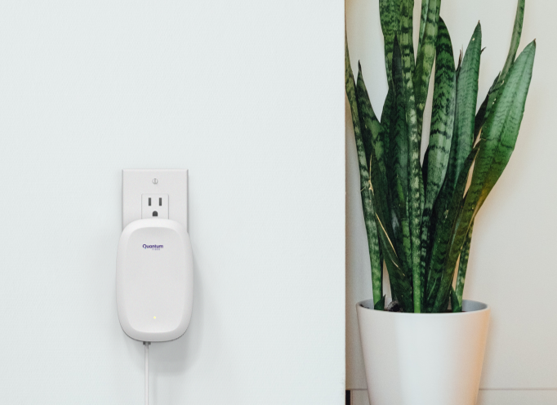
Vista frontal y posterior de un pod inalámbrico W1701K
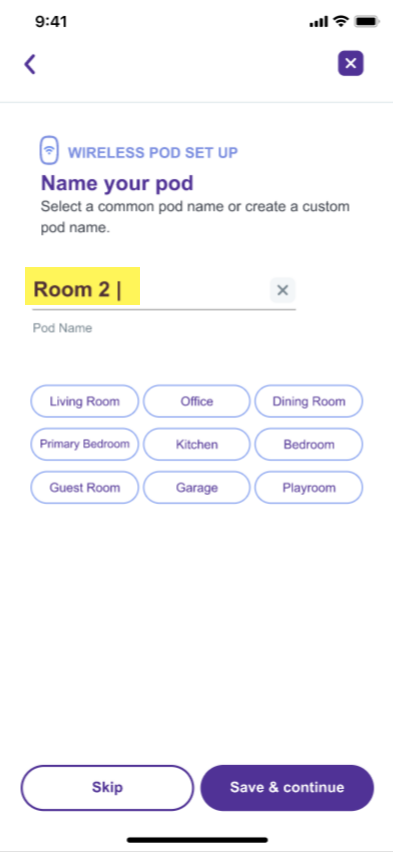
8. Asigna un nombre a tu pod. Puedes ingresar un nombre de ubicación de forma manual o elegir uno de las opciones prestablecidas. A continuación, toca Save & continue (Guardar y continuar). La pantalla de estado morada te indicará que está trabajando. El sistema agregará el pod inalámbrico a tu red.

9. Toca No Additional Pods (No hay pods adicionales) y Got it! (¡Entendido!) para confirmar la optimización.
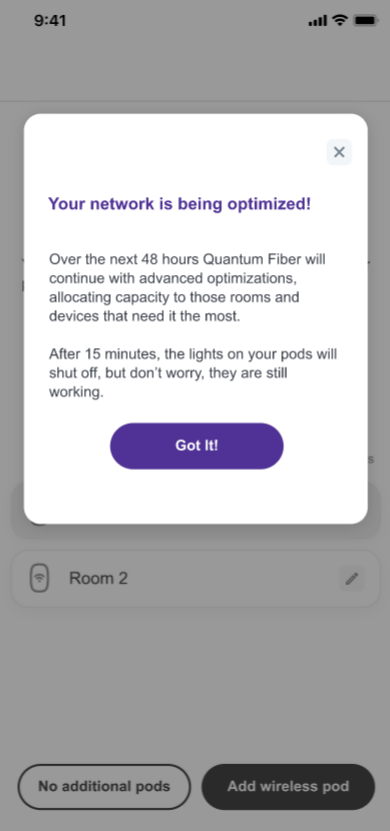
Tu red se optimizará en las próximas 24 a 48 horas. A medida que tus pods envíen más información a la nube, se sincronizarán continuamente para mejorar el rendimiento en tu entorno exclusivo.
Notarás que las luces de los pods se apagarán después de 15 minutos, y permanecerán apagadas durante el uso diario normal.
Consejos de ubicación de pods inalámbricos:
- Para un hogar de un solo piso, coloca el pod inalámbrico a mitad de camino entre la habitación más alejada en la que necesites conexión inalámbrica y el SmartNID con el pod con cable.
- Para un hogar de varios pisos, coloca el pod inalámbrico en un piso distinto al que están el SmartNID y el pod con cable.
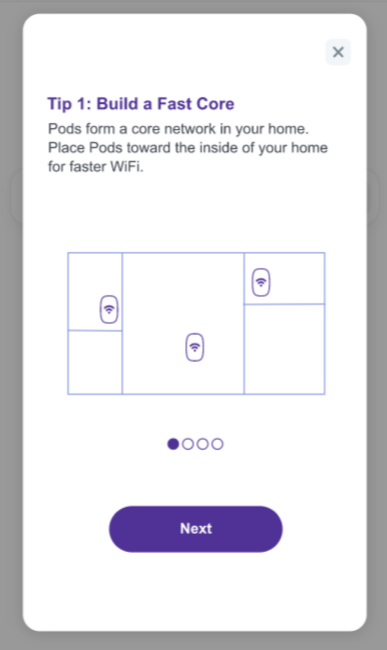
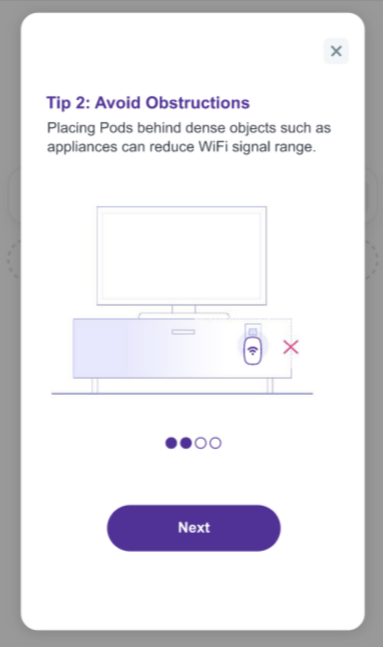
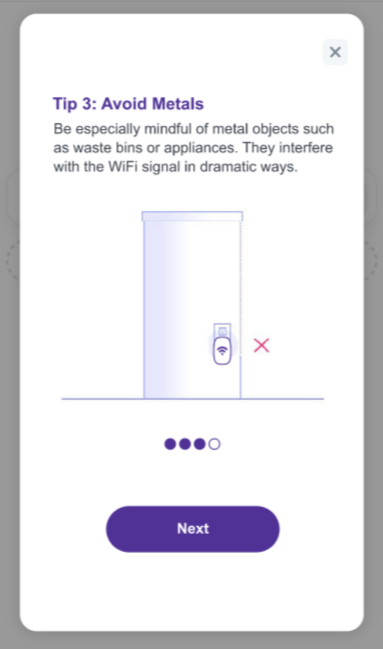
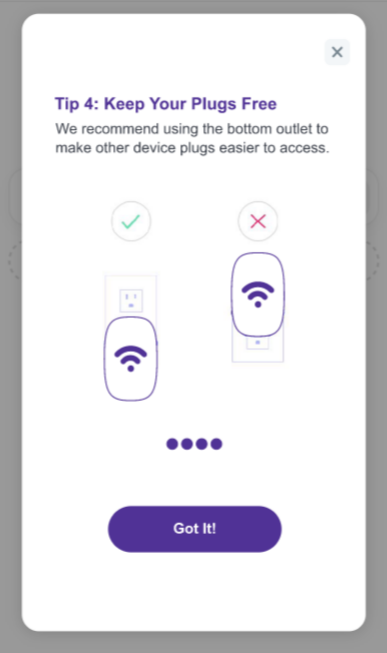
Y eso es todo: ¡estás listo para disfrutar tu 360 WiFi! El sistema continuará adaptándose y mejorando de forma inteligente a medida que conozca tus preferencias y necesidades.
Recomendaciones especiales para dispositivos Smart Home y televisores inteligentes de 2.4GHz
Los dispositivos Smart Home, como cámaras de seguridad y timbres, que necesitan una conexión de 2.4 GHz, deberían detectarse y conectarse de forma automática a tu red 360 WiFi. Si tienes problemas para conseguir que un dispositivo se conecte, asegúrate de que el dispositivo tenga el firmware actualizado.
Si el dispositivo sigue sin conectarse después de instalar las actualizaciones, contáctanos para que te ayudemos.
Deberías poder conectar tus Smart TV de la forma habitual: busca el nombre de red en la lista de redes disponibles e ingresa tu contraseña de Wi-Fi.
Si tienes problemas para hacerlo, estos son algunos pasos para solucionar problemas.
¿Necesitas más ayuda? Contáctanos si tienes más preguntas o necesitas más ayuda.
Temas relacionados
-
Consejos de ubicación de pods -
Solución a problemas de 360 WiFi -
Cambiar el nombre y la contraseña de la red 360 Wi-Fi -
Cambiar los pods a WiFi 7 -
Conectar un smart TV
¿Fue útil esta información?


